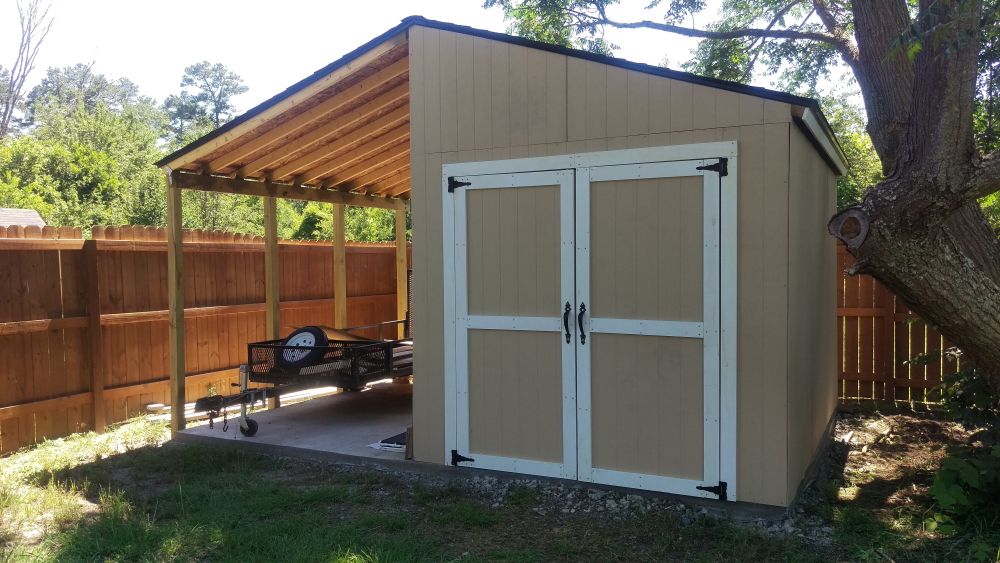
DIY Lean-To Shed: A Simple Guide to Backyard Storage Building
Tired of clutter overflowing your garage and backyard? Yearning for a simple, affordable solution to your storage woes? Building your own lean-to shed is a fantastic weekend project that delivers big results with surprisingly little effort. This guide provides a step-by-step walkthrough, empowering you to create a functional and attractive addition to your property. Forget expensive pre-fabricated sheds; you'll be amazed at what you can achieve with readily available materials and a little elbow grease.
Planning Your Lean-To Shed
Before you grab a hammer, careful planning ensures a successful build. Begin by determining the ideal location for your lean-to. Consider proximity to existing structures (like a house or garage) for support and ease of access. Then, measure the available space and decide on the dimensions of your shed. Sketch a simple design, noting the height, width, and depth. Remember to check local building codes and permits â€" some municipalities require permits for even small structures. Finally, create a detailed materials list based on your design. This list should include lumber (pressure-treated is recommended for longevity), roofing materials (metal roofing is durable and easy to install), fasteners (screws are preferable to nails), and any additional features you desire, such as a door or windows.
Gathering Your Materials and Tools
Once your plan is finalized, head to your local lumberyard or home improvement store. Gather all necessary materials according to your list. Don't forget essential tools, including a measuring tape, level, saw (circular saw or hand saw), drill, post hole digger (if needed), shovel, and safety glasses. A helper will significantly speed up the process, particularly during the more physically demanding stages of construction.
Essential Materials List
- Pressure-treated lumber for the frame and supports
- Roofing material (metal, asphalt shingles, or polycarbonate)
- Screws of various sizes
- Concrete mix (if needed for posts)
- Building wrap or tar paper (for weather protection)
Building the Shed Frame
Start by establishing a solid foundation. If your lean-to rests against an existing structure, ensure that the supporting wall is strong enough to handle the added weight. For freestanding lean-tos, consider setting concrete posts in the ground for added stability. Next, construct the frame. Begin by assembling the base frame, creating a rectangular structure using your pressure-treated lumber. Square the frame carefully to avoid future issues. Then, erect the supporting posts, ensuring they are plumb and level. Attach the rafters to the supporting structure and the existing wall (or posts) using screws, creating a sloping roofline. Remember to regularly check your work with a level to maintain accuracy and prevent structural issues.
Roofing and Finishing Touches
Once the frame is complete, you can install your chosen roofing material. Metal roofing is an excellent choice for its durability and ease of installation. Follow the manufacturer’s instructions carefully during this process. Next, apply building wrap or tar paper to protect the structure from the elements before adding your chosen roofing material. Finally, add any desired finishing touches. A simple door adds security and convenience. Consider adding shelves for optimal storage. A fresh coat of paint or stain will protect the wood and enhance the shed’s aesthetic appeal, completing your DIY lean-to shed project.
Remember: Safety first! Always wear appropriate safety gear, including safety glasses and work gloves. If you encounter any challenging aspects of the project, don't hesitate to seek advice from a more experienced builder.

0 comments:
Post a Comment
Note: Only a member of this blog may post a comment.