How to create a secure 12x16 storage shed

Thursday, November 7, 2024

How to create a secure 12x16 storage shed

Alright, so you're thinking about building a storage shed, huh? A 12x16 is a great size, plenty of room for all your stuff. But you want it to be secure, right? No one wants their tools and lawnmower going walkabout. I get it!

Let’s get into the nitty gritty:

Foundation First

The foundation is your first line of defense against unwanted critters and, well, unwanted people. You have a few options:

Concrete Slab: This is the most secure, but also the most expensive. It’s solid, sturdy, and will last forever. Plus, you can level it out perfectly to make sure your shed is sitting straight.
Concrete Block Foundation: A bit cheaper than a slab, you can stack concrete blocks and use mortar to create a sturdy base.
Pressure-Treated Wood: This is the most affordable option, but it's important to make sure the wood is properly treated and positioned to prevent rotting and decay. You'll need to make sure it's above ground to keep it dry.

No matter which option you choose, be sure to use a level to make sure everything is straight. And, you'll want to think about adding gravel beneath the foundation to help with drainage.

Building the Walls

You want a shed that's sturdy and can stand up to weather and maybe even a curious burglar. Here's what to consider:

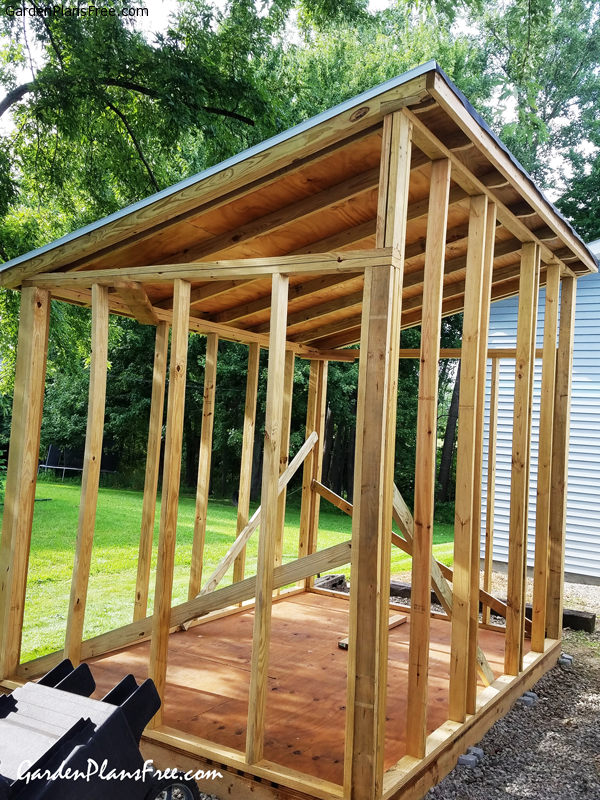
Wood Framing: Traditional framing using lumber is the most common. You'll want to use pressure-treated lumber for the bottom plates and the bottom portion of the walls to help prevent rotting. Consider using thicker lumber for added strength, especially for the bottom plate and the corner posts.
Plywood Sheathing: This goes on top of the framing and adds strength to the walls. It also helps to create a more secure surface for the siding.

Security Features: Don't Forget the Details

Now, let's talk about security! Here's where you really need to think like a thief and make sure your shed is a no-go zone:

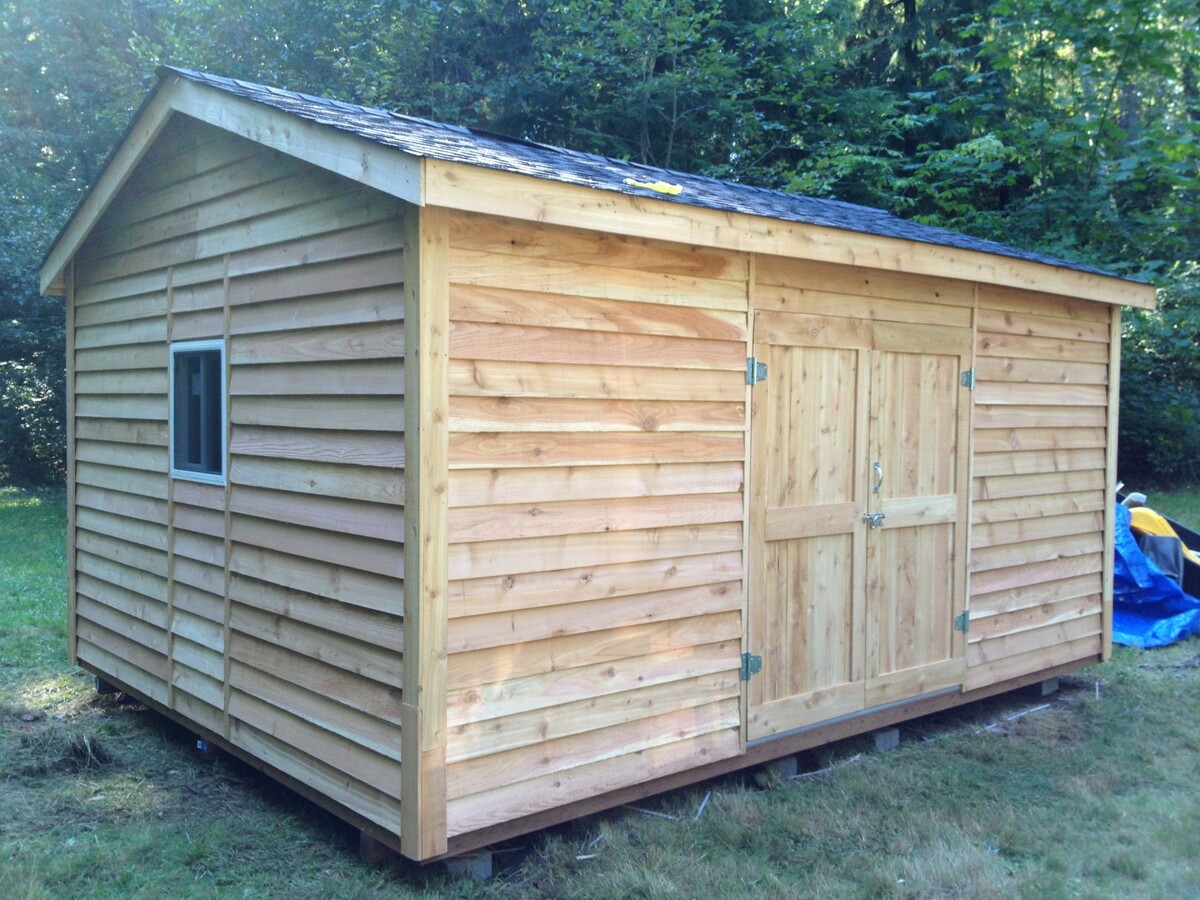
Strong Doors: Forget flimsy, single-panel doors. Go with a solid core door or a double-door system. Make sure the hinges are strong and preferably on the inside so they can't be easily removed.
Sturdy Hardware: Don't skimp on the lockset. Invest in a good quality, heavy-duty deadbolt. You can even consider a double-cylinder deadbolt, which requires a key from both the inside and the outside.
Reinforce the Door Frame: A thief will often try to pry open a door at the frame. Make sure to use extra strong screws or metal plates to reinforce the frame around the door.
Reinforce the Walls: Use metal security plates or metal mesh to cover any vulnerable areas on the walls. This makes it harder for a thief to get in through the walls.

Extra Security Tips

Motion Sensor Lights: Bright lights can deter thieves. Consider installing motion sensor lights around the shed.
Security Camera: A security camera that can record and send alerts to your phone can be a great deterrent.
Alarm System: If you're really serious about security, consider a simple alarm system that alerts you if someone tries to break in.

Roofing and Ventilation:

Roofing: Choose a sturdy roofing material. Metal roofing is strong and durable, plus it's fire-resistant. Asphalt shingles are another popular option. Just make sure to secure the roof to the framing properly.
Ventilation: A shed needs ventilation to prevent moisture build-up. Make sure you have vents in the roof and/or walls.

Finishing Touches

Now, let’s make your shed look good!

Siding: Choose a durable siding material that is easy to clean and maintain. Vinyl siding is a popular choice because it's long-lasting, easy to clean, and comes in a variety of colors.
Paint: Paint the shed a light color to help keep it cool in the summer. You can also use contrasting colors to accentuate the design.
Landscaping: Add some landscaping around the shed, such as bushes or trees, to give it a finished look and provide some privacy.

Remember, security is a process, not just one step. By considering each element of the construction and adding security features throughout, you can create a shed that’s as secure as it is beautiful.

Final Thoughts

Building a secure shed is a big project, but it’s well worth it. A sturdy, secure shed will give you peace of mind, knowing that your belongings are safe and sound. Good luck with your project!

Read More..

Diy lean-to storage shed: tips for new builders

Diy lean-to storage shed: tips for new builders


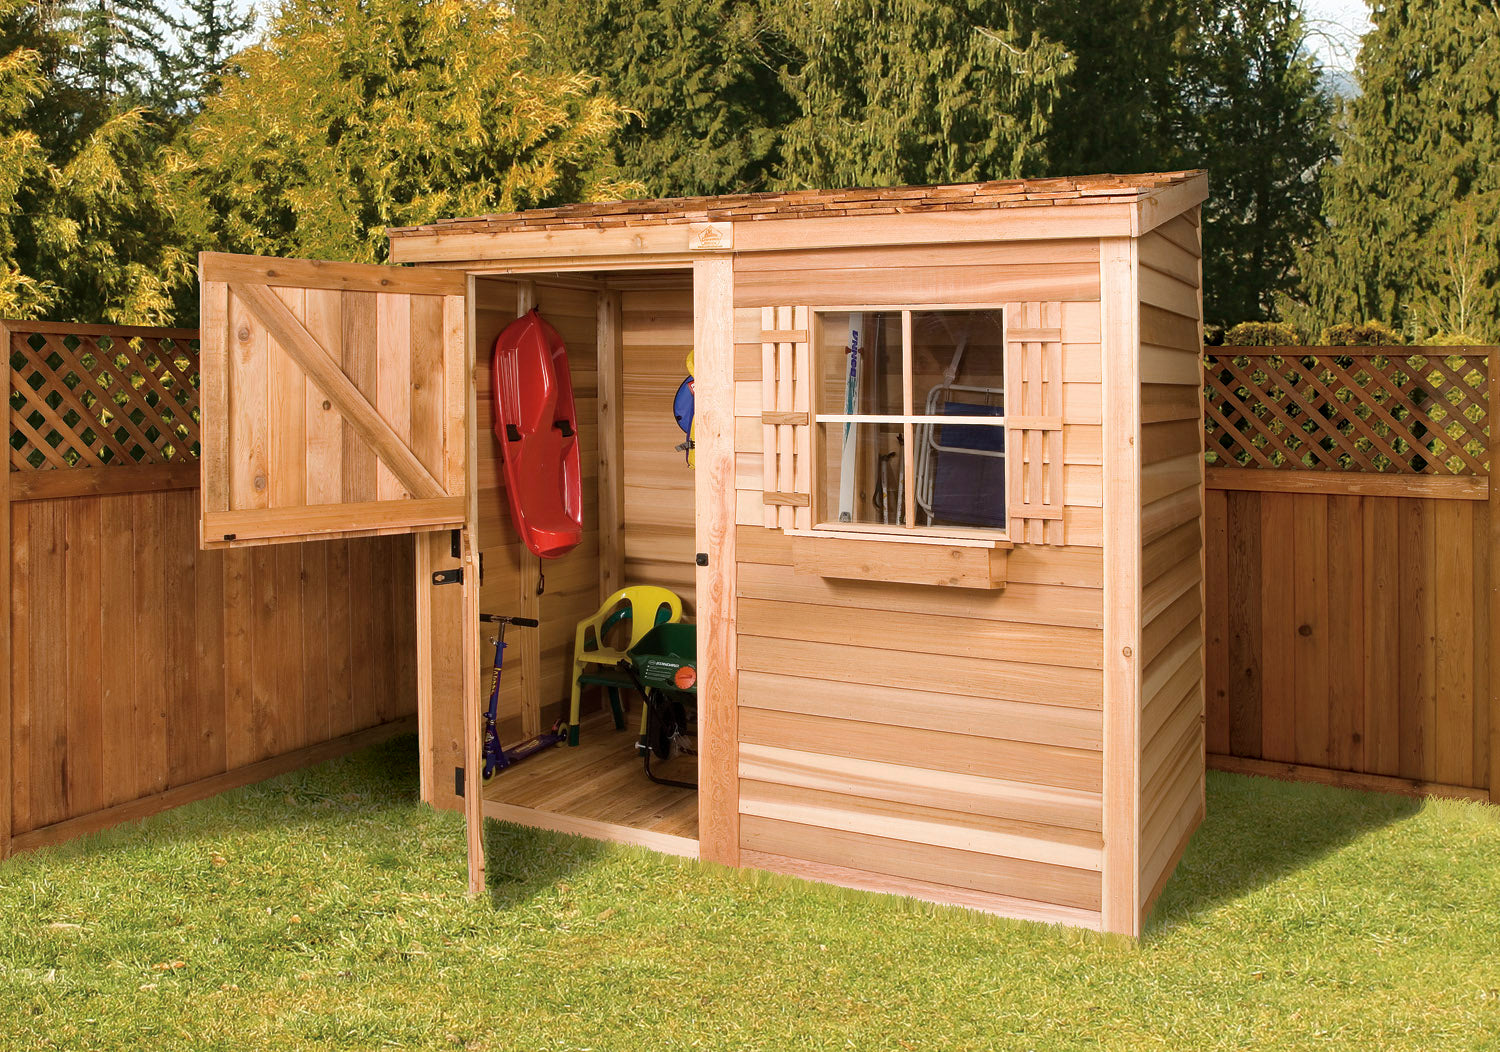
Hey there, fellow DIY enthusiasts! You're looking to build a lean-to shed, huh? Good choice! They're super versatile, relatively easy to build, and perfect for a variety of storage needs.

But let's be real, building anything can seem daunting, especially if you're a newbie. Don't worry! I'm here to walk you through the process, sharing some tried-and-true tips to make your lean-to shed project a smooth and rewarding one.

### The Foundation: Get a Solid Start

First things first, you need a strong foundation. A lean-to shed leans against an existing wall, so your foundation is really just a base for the front and sides. Here are some key points:

Choose the right material: Concrete blocks, treated lumber, or even pavers can work great. Consider the soil conditions and your budget when making this decision.
Level it up: This is super important for a shed that's sturdy and looks good. Use a level to make sure your foundation is perfectly flat before you start building.
Think about drainage: You don't want your shed to flood! Make sure your foundation is slightly sloped away from your house to allow water to drain.

### The Framing: Building Your Skeleton

Now it's time to build the skeleton of your shed! This is where you'll use those trusty 2x4s and some basic carpentry skills.

Measure twice, cut once: This is a classic saying for a reason. Accurate measurements are essential for a square and sturdy shed. Take your time and double-check everything before you start cutting.
Use a framing square: This tool is your best friend when building the frame. It ensures your corners are perfectly square, preventing your shed from leaning or collapsing.
Think about the roof: The lean-to design means your roof will be a simple slope. Consider using pre-made roof trusses to simplify the process. You can also create your own using 2x4s and plywood.
Don't forget the bracing: Adding bracing to your walls and roof is crucial for structural stability. It's not the most glamorous part, but it's vital!

### The Sheathing: Filling in the Gaps

Now that you have your frame, it's time to add sheathing. This is the plywood or OSB that provides the foundation for your siding and roof.

Choose the right sheathing: Plywood is a classic option, but OSB (Oriented Strand Board) is a good alternative and is usually cheaper.
Secure it properly: Use screws or nails that are long enough to go through the sheathing and into the framing. Space them according to the manufacturer's recommendations.
Remember the roof: You'll need to install sheathing on the roof too, making sure it runs perpendicular to the direction of the rafters. This will give your roof added strength.

### The Finishing Touches: Making Your Shed Look Great

You've built the foundation, the frame, and added the sheathing. Now it's time to make your shed look awesome!

Siding: There are endless options here! Wood, vinyl, metal - it's up to your style and budget. Remember to choose siding that's designed to withstand the elements.
Roofing: Shingles, metal, or even corrugated metal roofing are all good choices. Make sure you install them correctly and use the proper underlayment.
Doors and windows: Do you need a door for easy access? Maybe a window to let in some light? Now's the time to choose and install them.
Trim: Adding trim around your doors, windows, and roof edges will give your shed a polished look.

### Tools and Materials: What You'll Need

So, you've decided to take the plunge and build your very own lean-to shed. Great! But first, you need to gather the essential tools and materials.

Tools:

Saw: A circular saw or a handsaw will be your go-to for cutting lumber.
Tape measure: Accurate measurements are key!
Level: You need this to ensure everything is perfectly flat and level.
Hammer: A trusty hammer for driving nails and securing pieces.
Drill: A drill with various bits is essential for attaching screws and creating pilot holes.
Safety gear: Always wear safety glasses, gloves, and a mask when working with power tools.

Materials:

Lumber: You'll need various sizes of treated lumber for the framing, sheathing, and foundation.
Fasteners: Nails, screws, and construction adhesives will hold your structure together.
Sheathing: Plywood or OSB will cover the frame.
Siding: Choose your preferred siding material â€" wood, vinyl, metal, or others.
Roofing: Select your roof type â€" shingles, metal, or corrugated.
Doors and windows: Opt for the size and style you desire.
Trim: Add finishing touches with trim boards around doors, windows, and the roof.

### Important Considerations:

Before you start building, there are a few things to keep in mind:

Permits: Check with your local building department to see if you need any permits before starting construction.
Building codes: Make sure your shed meets local building codes.
Location: Choose a spot that's level and well-drained. Make sure the lean-to side of your shed is securely attached to your existing wall.
Foundation: Ensure the foundation is strong enough to support the weight of the shed.
Roof slope: The slope of your roof needs to be steep enough to allow for proper drainage.

### Let's Get Building!

Building a lean-to shed might seem like a big task, but by breaking it down into smaller steps and taking your time, you'll be surprised at what you can accomplish. Remember, there's no shame in asking for help if you need it. There are tons of resources available online and in your local community, like YouTube tutorials, home improvement stores, and even friendly neighbors.

So, grab your tools, gather your materials, and let's get building! You'll be surprised at how much satisfaction you'll get from creating something useful with your own two hands. Happy building!

Read More..

How to build a diy garden shed that doubles as a potting shed

How to build a diy garden shed that doubles as a potting shed


Alright, fellow green thumbs, let's talk sheds! You know that feeling â€" you’ve got seeds sprouting, seedlings begging for a larger home, and your tools are piled precariously in the garage. It's time for a dedicated space, a sanctuary for your gardening adventures. But why stop at just a shed? Let's build something amazing: a garden shed that doubles as a potting shed, a haven for all things green!

Step One: Planning the Perfect Paradise

Before we get our hands dirty (literally!), let's put some thought into our dream shed. Imagine yourself working in your green haven. What do you envision?

Size Matters: How much space do you need? Think about storing tools, potting benches, seed trays, and even your favorite gardening books! A good size for a multi-functional shed is around 8’x10’, but tailor it to your specific needs.
Location, Location, Location: Think about sunlight, accessibility, and drainage. You want a spot that's convenient for you, but also allows your plants to flourish.
Material Magic: Wood is a classic choice, offering warmth and versatility. But don't forget about metal sheds, especially for longevity and low maintenance. Let's be honest, we want more time tending to our gardens, not our shed!
The Ultimate Extras: Do you need electricity? Windows for natural light? A workbench with a built-in potting bench? Now's the time to dream big!

Step Two: Building the Foundation (A Strong Start is Key!)

Now that we have a plan, let's lay the groundwork for our garden masterpiece. There are a few ways to approach this, each with its own pros and cons:

Concrete Slab: The most sturdy and permanent option. It requires some expertise and a bit more work, but it's incredibly durable and a great choice for heavier sheds.
Gravel Pad: A simpler and more budget-friendly option. You'll need to compact the gravel well and consider using landscaping fabric for weed control.
Wooden Skirts: This option is best for flat, well-drained soil. It involves creating a wooden frame and securing it to the ground.

Step Three: The Structure (The Skeleton of Your Garden Oasis)

We're getting to the heart of our project! Choosing the right framing material is important. Here's a quick breakdown:

Wood Framing: Classic and versatile. Pine is affordable, but pressure-treated lumber is a better choice for longevity.
Metal Framing: Strong and durable, but can be trickier to work with.

With your framing material chosen, you'll need to construct walls and a roof. Remember to factor in the following:

Roof Style: A gable roof is the most common, providing good water runoff. A shed roof is a more modern option, but it may not be as resistant to heavy snowfall.
Doors and Windows: Consider the size and placement of your doors and windows for easy access and optimal sunlight. Windows are particularly beneficial for starting seeds or providing a light source for nighttime tasks.

Step Four: Sheathing and Siding (The Skin of Our Garden Beauty)

Now it's time to add some muscle and aesthetic appeal to our shed. We'll need sheathing to create a solid surface for the siding:

Sheathing: OSB (oriented strand board) is a budget-friendly option, while plywood offers better strength and durability. Be sure to choose a grade appropriate for exterior use.
Siding: Here's where your creativity shines! Choose from wood (cedar, redwood, or painted pine), vinyl, metal, or even recycled materials for a unique look. Don't forget about trim and fascia boards to add a polished touch.

Step Five: The Roof (Covering Our Green Haven)

A sturdy roof is essential to protect your gardening treasures. Here's a breakdown of the options:

Shingles: Asphalt shingles are affordable and easy to install. For a longer-lasting option, consider metal roofing.
Underlayment: This layer provides an extra layer of protection from the elements.

Step Six: The Finishing Touches (A Haven of Functionality and Charm)

We're almost there! Here's where we turn our shed into a true potting haven:

Potting Bench: This is the heart of your potting shed. Build a sturdy workbench with a large countertop and a shelf for storage. Consider adding a built-in sink or water source for your plants.
Shelving and Storage: Maximize vertical space with shelves for seeds, pots, tools, and everything in between.
Lighting: Proper lighting is essential for working in your shed, especially on cloudy days. Consider adding overhead lighting and possibly a dedicated circuit for power tools.
Electrical Outlets: If you plan on using power tools, be sure to include electrical outlets. For ultimate comfort, you can even install a small space heater for chilly days.

Step Seven: The Personal Touch (Making it Your Own!)

Now that the shed is structurally sound, let your personality shine! Here are some ideas:

Paint It Up: Give your shed a fresh coat of paint in a color that complements your garden. Consider a vibrant green or a calming blue.
Add Some Charm: Hang a colorful wind chime, plant a vine to climb on the side, or place a birdhouse on the roof. Let your creativity flow!
Embrace Functionality: Add hooks for tools, a magnetic strip for metal tools, or a pegboard for organizing supplies.

Congratulations! You’ve created a magnificent, multifunctional garden shed, a true sanctuary for your green passion! Remember, this is a journey, not a race. Enjoy the process, savor the satisfaction of creating something with your own hands, and don't be afraid to add your own personal touches. Happy gardening!

Read More..

How to build an 8x10 shed that won’t break the bank

How to build an 8x10 shed that won’t break the bank


Alright, so you're thinking about building a shed. Maybe you want to store your gardening tools, create a little workspace, or just have a place to escape the chaos of your house for a bit. But the thought of construction costs makes you want to crawl back into your comfy chair. Don't worry, building an 8x10 shed doesn't have to be a bank-breaking endeavor.

We're going to tackle this project together, step-by-step, with a focus on saving money without sacrificing quality. You'll be surprised how far a little ingenuity and elbow grease can take you!

Step 1: Planning and Design

Before you grab your hammer and nails, it's important to do your homework. This step is crucial for keeping your costs in check and ensuring your shed is functional and safe.

Measure Twice, Cut Once: First, decide on the exact dimensions of your shed. 8x10 feet is a good starting point for most purposes, but don't be afraid to adjust based on your needs.
The Floor is the Foundation: You have several options for your shed floor: a simple gravel base, a concrete slab, or a wooden frame with plywood. For cost-effectiveness, a gravel base is usually the winner, especially if you're on a budget.
Walls and Roof: Decide between pre-made panels or building your own walls. Pre-made panels are quicker but can be pricey. Building your own walls saves money, but requires more time and effort. Consider the level of your DIY skills and the time you have available.
The Roof's the Thing: For an 8x10 shed, a simple gable roof is usually the most cost-effective and easy to build. If you're going for a more complex design, be prepared for increased costs.
Materials and Tools: Research different building materials like pressure-treated lumber, plywood, and roofing shingles. Compare prices at multiple stores and consider buying in bulk to save.

Step 2: Getting Your Hands Dirty (But Not Too Dirty!)

Now comes the fun part â€" actually building your shed! Here's a breakdown of the process:

Foundation First: Start with the foundation. If you're using a gravel base, level the ground, add a layer of gravel, and compact it thoroughly. Remember, a stable foundation is crucial for a long-lasting shed.
Framing the Structure: Build the floor frame using pressure-treated lumber. Ensure the frame is square and level before attaching plywood to create the floor. You can save money by using recycled or salvaged lumber if you're comfortable with that.
Walls Up!: For pre-made panels, simply attach them to the floor frame. If you're building your own walls, cut studs to the correct height, attach them to the floor frame, and then add sheathing (plywood or OSB).
Roofing Time: Construct the roof rafters and attach them to the walls. Then, add sheathing and roofing felt before applying the shingles.
Finishing Touches: Install the siding, trim, windows, and doors. Be creative and experiment with different styles to personalize your shed. You can even use recycled materials like old doors or windows to save money!

Step 3: Don't Forget the Essentials

To make your shed truly functional and enjoyable, consider these important details:

Ventilation: Proper ventilation is crucial to prevent moisture buildup and keep the air fresh. Install vents in the roof and walls.
Electrical Wiring: If you plan on using electricity in your shed, consult a qualified electrician for safe and code-compliant wiring.
Insulation: Adding insulation to the walls and roof can make your shed more comfortable and energy-efficient. Choose a cost-effective option like fiberglass batt insulation.
Flooring: For a more polished look, consider adding flooring on top of the plywood base. You can use inexpensive options like linoleum or even concrete paint.
Storage Solutions: Maximize your shed's space by installing shelves, hooks, or even a workbench. Think about what you'll be storing and plan accordingly.

Saving Money and Building Confidence

Building your own shed can be a rewarding experience and a great way to save money. Here are some additional tips to keep your budget in check:

Shop Around: Compare prices at different lumberyards, hardware stores, and even online retailers.
Use Recycled Materials: Don't be afraid to think outside the box and incorporate salvaged or recycled materials into your shed.
Barter or Trade Skills: Do you have skills that someone else needs? Offer to trade your skills for materials or labor.
Ask for Help: Enlist the help of friends or family to save on labor costs. Building a shed can be a fun and rewarding experience for everyone involved.

Remember, building a shed doesn't have to be complicated or expensive. With a little planning, ingenuity, and a willingness to get your hands dirty, you can create a functional and stylish space that you'll love for years to come.

So go ahead, grab your tools, and unleash your inner DIYer! You've got this!

Read More..

Affordable diy tips for building a 12x16 storage shed

Affordable diy tips for building a 12x16 storage shed


Alright, so you're thinking about building a storage shed. Good call! It's amazing how much stuff we accumulate, and a shed can be a lifesaver for keeping things organized and out of the weather. Plus, you can build a sense of accomplishment and save a bunch of money by doing it yourself.

But before you dive in headfirst, let's talk about the "affordable" part. We're aiming for a budget-friendly shed, and that means smart planning and some strategic sourcing. We're not talking about cutting corners on quality, but we'll be looking for ways to make the most of our materials and save where we can.

### 1. Planning is Key: Layout, Permits, and Materials

The first step is planning, which might sound boring, but it's crucial. Here's a breakdown:

Draw it out: Before you even start, sketch out a rough layout. Think about how you want to use the space. Do you need shelves? A workbench? A separate section for tools? Get that plan down on paper.
Think about your location: Where's the best spot for your shed? Consider sunlight, drainage, and accessibility. Make sure it's far enough from your house to avoid any issues with setbacks or regulations.
Check local codes: Don't forget to check with your local building department! They'll likely have regulations regarding permits, foundation types, and building codes. It's better to be safe than sorry.
Materials list: Now's the time to make a materials list. This is where you start thinking about your budget. You can use free online calculators or create your own spreadsheet. Here's a basic list to get you started:
Foundation: Concrete blocks, gravel, pavers, or pressure-treated wood (depending on your local codes)
Framing: Pressure-treated lumber for the base, 2x4s for the walls and roof, and plywood sheathing
Roofing: Shingles, underlayment, and roofing felt
Siding: Wood, vinyl, metal, or even recycled materials like old pallets (get creative!)
Doors and windows: You can save money here by buying used or finding deals.
Hardware: Screws, nails, brackets, hinges, and handles
Paint or stain: This is a good way to add some personality and protect your shed.

### 2. Foundation First: Building a Strong Base

Now let's talk about your foundation. This is the base of your shed, so it needs to be strong and level.

Concrete block foundation: This is a common and relatively affordable option. You'll need to pour concrete into the blocks to create a solid base.
Gravel foundation: This is a good option if you have good drainage and are looking for a simple approach. You'll lay down a layer of gravel and level it out.
Pressure-treated wood: This is a good option for a smaller shed and is easier to work with than concrete. However, make sure the wood is properly treated to resist rot.
Pavers: You can use pavers to create a very durable and attractive foundation. It's a little more expensive, but it's a great option if you want a finished look.

No matter which option you choose, make sure your foundation is level and strong. This will make the rest of your shed construction easier and prevent issues later on.

### 3. Framing the Structure: The Bones of Your Shed

The framing is the skeleton of your shed. It's important to use strong, sturdy lumber, but you can save money by buying it in bulk or finding good deals at local lumber yards.

Base framing: Build a rectangular base using pressure-treated lumber. This will keep your shed off the ground and prevent rot.
Wall framing: Use 2x4s to build the walls. Remember to include studs for windows and doors.
Roof framing: This is where things get a little more complex. You'll need to build rafters and a roof truss system. There are lots of online resources available to help you with this.
Sheathing: Plywood sheathing goes on top of your framing to provide a solid surface for siding and roofing.

### 4. Siding and Roofing: Making It Weatherproof

Now for the exterior! This is where you can get creative.

Siding: You have lots of options here, from wood to vinyl to metal. If you're looking to save money, consider using recycled materials like old pallets or corrugated metal.
Roofing: Shingles are a popular choice for sheds, but you can also use metal roofing, which is durable and can last for many years.
Windows and doors: Find deals on pre-built doors and windows, or even consider building your own.

### 5. Finishing Touches: Making It Your Own

Almost there! Now it's time to personalize your shed.

Paint or stain: Add some color and protect your shed with paint or stain.
Shelves and storage solutions: You can buy pre-made shelves or build your own. Get creative with your storage solutions to maximize space.
Lighting and electrical: Adding lighting and electricity can make your shed even more functional. Make sure to get the proper permits and follow electrical codes.

### Final Thoughts: A Journey Worthwhile

Building a storage shed is a great DIY project. It's challenging, but rewarding. Remember to stay patient, don't be afraid to ask for help, and have fun with the process!

Here are some final tips to keep in mind:

Take your time: Don't rush the process. It's better to take your time and do it right than to rush and make mistakes.
Use the right tools: Investing in quality tools will make your work easier and faster.
Be prepared for weather: Check the forecast before you start working, and be prepared for rain, wind, or snow.
Clean up as you go: This will keep your work area organized and make it easier to clean up when you're finished.

With a little planning, effort, and creativity, you can build a sturdy and affordable storage shed that you'll be proud of for years to come. So, get out there and get building! You've got this.

Read More..

Build your own 8x12 shed for less with these diy plans

Wednesday, November 6, 2024

Build your own 8x12 shed for less with these diy plans


Hey there, fellow DIYer! Are you tired of staring at that messy pile of "stuff" taking over your garage or backyard? Maybe you're dreaming of a dedicated workspace or a cozy outdoor hangout spot. Well, guess what? You don't have to shell out a fortune for a pre-built shed. You can build your own 8x12 masterpiece and save a ton of cash in the process!

I know what you're thinking â€" "building a shed? That's too hard!" But trust me, with the right plans and a little elbow grease, it's totally doable. Plus, the feeling of accomplishment when you stand back and admire your handiwork? Priceless!

So, let's dive in and get those tools ready!

Step 1: Planning is Key - It's More Than Just Drawing Lines

Before you even think about buying lumber, sit down and map out your shed. Consider these questions:

Where will it go? Do you have level ground? Need to pour a concrete pad? Are there any trees or utilities in the way?
What will you use it for? Storage? Workshop? Maybe a cozy hangout with a mini-fridge and comfy seating? Think about how you'll use the space and plan accordingly.
What materials are best? Do you want a traditional wood shed, a sleek metal shed, or something in between? Research different materials and their pros and cons. Think about cost, durability, and the overall look you want.
What's your budget? Be realistic about how much you can spend. Shop around for the best deals on materials and don't be afraid to negotiate!
What permits do you need? Check your local building codes. You may need a permit to build a shed, depending on its size and location.

Once you've answered these questions, you're ready to start planning the specifics. Draw a rough sketch of your shed, including the dimensions, door and window placement, and any additional features you want. Don't be afraid to get creative â€" you can add a loft for extra storage, a small porch, or even a skylight!

Step 2: Gather Your Tools and Materials - Like A DIY Warrior!

Now that your plan is set, it's time to stock up on the essential tools and materials. Don't worry, you don't need a whole warehouse full of gear. A basic set of tools will do the trick. Here's a list to get you started:

Measuring Tape & Level: Your best friends! Precision is key, especially when cutting lumber.
Saw: A circular saw or a table saw will be your trusty cutting companions.
Drill/Driver: Essential for assembling and attaching components.
Hammer: For driving nails, securing framing, and those moments of frustration when things don't go perfectly (we've all been there!).
Safety Glasses & Work Gloves: Protect your eyes and hands! Safety first, always!
Lumber: This is the bulk of your materials. Choose the right type and size depending on your design. Don't forget to factor in a little extra for potential errors!
Sheathing & Roofing: These will create the skin and roof of your shed. Choose options that are weatherproof and long-lasting.
Doors & Windows: Add a touch of style and functionality. Measure carefully for a perfect fit.
Fasteners: Nails, screws, and staples will hold everything together.
Paint or Stain: Give your shed a final touch of personality. Pick colors that complement your house or your personal style.

Step 3: Lay the Foundation - The Strong Base of Your Shed Dreams

Your shed needs a solid foundation to support its weight. Here are a couple of options:

Concrete Slab: The most sturdy option, but it's also the most time-consuming. You'll need to pour concrete and wait for it to cure. But it's worth it for a long-lasting base.
Wooden Cribbing: A simpler and faster alternative. Use treated lumber to create a raised frame that sits on concrete blocks. Just make sure the ground is level and stable.

Step 4: Framing - Building The Skeleton Of Your Masterpiece

Now comes the fun part â€" building the framework of your shed. Follow your plan closely and use your measuring tape and level to ensure everything is square and level.

Floor Joists: Lay down the floor joists, making sure they are spaced correctly to support the floor sheathing.
Wall Studs: Erect the wall studs, connecting them to the floor joists and the top plate. Again, use your level to ensure they are perfectly vertical.
Roof Rafters: Cut and install the roof rafters, making sure they are securely attached to the top plate and the wall studs.
Roof Sheathing: Lay the sheathing on the roof rafters, creating a smooth surface for the roofing shingles.

Step 5: Siding & Roofing - Adding The Finishing Touches

With the framing complete, it's time to add the exterior skin and roof.

Siding: Install the siding of your choice, whether it's wood, vinyl, or metal. Make sure the seams are tight and weatherproof.
Roofing: Lay the roofing shingles, making sure they overlap properly to prevent leaks. Choose shingles that match your shed's style and your budget.

Step 6: Doors & Windows - The Finishing Touches

Now comes the fun part - adding the doors and windows!

Measure and Cut: Measure the openings carefully and cut the frames for your doors and windows.
Install: Install the frames and then hang your doors and windows. Use weatherstripping to prevent drafts and leaks.

Step 7: Final Touches - The Personalization Stage

You're almost there! Now it's time to add those final touches to make your shed truly unique.

Paint or Stain: Choose your colors and give your shed a fresh coat of paint or stain. Consider using weather-resistant paint for added protection.
Insulation: If you plan on using your shed for a workshop or a hangout space, consider adding insulation to the walls and ceiling. This will help keep the temperature comfortable year-round.
Flooring: Install the flooring of your choice. Wood, concrete, or even carpet - it's up to you!
Electrical: If you need electricity in your shed, run the wiring carefully and install outlets and light fixtures. Make sure to follow all electrical codes and regulations.

Step 8: Stand Back and Admire - Your DIY Triumph!

Congratulations! You've just built your own 8x12 shed, and you're probably feeling pretty proud of yourself. Enjoy your new space â€" it's yours to customize and enjoy!

A Few Final Tips:

Don't be afraid to ask for help. If you're not comfortable with a certain task, ask a friend or family member for help.
Take your time and don't rush. Building a shed is a process, so enjoy the journey.
Be patient and persistent. You might encounter some challenges along the way, but don't give up! With a little perseverance, you'll get it done.

So go ahead, grab those tools, and start building your own 8x12 shed. It'll be the best money you'll ever spend, and you'll have a sense of accomplishment that's worth more than any dollar amount!

Read More..

Step-by-step diy guide to building an affordable 8x12 shed

Step-by-step diy guide to building an affordable 8x12 shed


Hey there, fellow DIY enthusiasts! Tired of that overflowing garage or struggling to find space for all your tools? Well, building your own 8x12 shed is a fantastic solution, and trust me, it's not as daunting as it sounds. With a little planning, some elbow grease, and this step-by-step guide, you'll be well on your way to creating a functional and affordable storage space.

1. Planning and Preparation: Laying the Foundation

Before you dive headfirst into the project, it's essential to think through the details and plan out your shed. Here's a breakdown of the key things to consider:

Location, Location, Location: Pick a spot for your shed that's accessible and provides adequate drainage. Make sure it's not too close to any utilities or trees.
Building Codes: Check with your local building department for permits and any specific regulations for sheds in your area. This will save you headaches down the road.
Foundation: Choose a foundation that suits your budget and the soil conditions. A concrete slab is a durable option but can be expensive. A gravel base with pressure-treated skids offers a more affordable alternative. You can also consider using recycled materials like railroad ties for a unique touch.
Materials: Consider the material for your shed walls and roof. Pressure-treated lumber is a good choice for the foundation and bottom plates for its moisture resistance. For the walls and roof, you can opt for pre-made siding panels or go for traditional wood framing and sheathing.

2. Foundation: Building Your Shed's Base

Let's start with building the foundation, the bedrock of your shed.

Gravel Base: If you've opted for a gravel base, first level the ground using a rake and a level. Then, lay down a layer of gravel at least 4 inches deep. Compact the gravel using a tamper or a heavy object.
Pressure-Treated Skids: Cut your pressure-treated 4x4s to the length of the shed (12 feet). Use a sawhorse or a sturdy bench for support while cutting. Next, cut 2x4s for the bottom plates, which will be attached to the skids. You'll need four of these, each measuring the width of the shed (8 feet).
Assembly: Place the skids on the compacted gravel, ensuring they're parallel and level. Attach the bottom plates to the skids using screws or galvanized nails. You can use metal brackets for added strength.

3. Framing: Building the Skeleton of Your Shed

Now it's time to start framing, the structural backbone of your shed.

Wall Framing: Cut 2x4s to the height of the shed walls (typically 8 feet). These will be the wall studs. You'll need to cut enough studs to create a 16-inch spacing between them, which is standard for framing. Attach the wall studs to the bottom plates using screws or nails.
Top Plate: Once you have the wall studs in place, attach a top plate to the top of the studs, again using screws or nails. You'll need two top plates, one for each side of the wall.
Roof Framing: For the roof, you'll need to build the rafters. Cut 2x4s to the length of the rafters (based on your roof pitch) and then connect them to the top plates using a framing square and nails or screws.
Ridge Board: Once the rafters are in place, connect the top of the rafters with a ridge board, which runs the length of the shed.

4. Sheathing: Covering the Framework

Now we're getting close to the visual shape of your shed.

Wall Sheathing: Attach plywood sheathing to the wall framing. This adds strength and a solid surface for the siding. Use screws or nails to secure the sheathing.
Roof Sheathing: Similarly, attach plywood sheathing to the roof framing. This creates a base for the roofing material.

5. Roofing: Keeping Your Shed Safe and Sound

Now it's time to shield your shed from the elements.

Roofing Material: Choose roofing material that fits your budget and style. Asphalt shingles are affordable and easy to install. Metal roofing is durable and long-lasting but more expensive. You can even use recycled materials like corrugated metal sheets for a unique look.
Underlayment: Before installing your roofing material, lay down a layer of felt underlayment. This provides an extra layer of protection against moisture and wind.

6. Siding: Giving Your Shed a Facelift

Now it's time to give your shed its personality!

Siding Choices: You can choose from a variety of siding options, from traditional wood to modern composite materials. For a budget-friendly option, pre-made siding panels are easy to install. If you prefer a more rustic look, you can use cedar shakes or even recycled materials like barn wood.

7. Windows and Doors: Bringing Light and Access

Now let's add some essential features.

Windows: Install windows for natural light and ventilation. You can choose from various sizes and styles.
Doors: Select a door that fits your needs and style. Consider using a double door if you need to move large items.

8. Finishing Touches: Adding the Final Flourishes

Finally, it's time to add the finishing touches and bring your shed to life!

Trim and Molding: Add trim around the doors, windows, and the roofline to create a polished look.
Paint or Stain: Give your shed a fresh coat of paint or stain to protect it from the elements and add a touch of personality.
Shelving and Storage: Consider adding built-in shelves or storage units to maximize the interior space.

9. Safety First:

Electrical Wiring: If you need electricity in your shed, ensure the wiring is done professionally and meets all local codes.
Fire Safety: Install a smoke detector and consider a fire extinguisher for added safety.

10. Celebrate Your Success!

Congratulations! You've successfully built your own 8x12 shed. Now it's time to enjoy your new storage space and take pride in your accomplishment.

Tips for Keeping It Affordable:

Shop around for materials: Compare prices at different lumber yards and home improvement stores to find the best deals.
Consider using recycled materials: You can often find affordable options like recycled wood, metal, or even concrete blocks.
Ask for help: Don't be afraid to enlist the help of friends or family to save on labor costs.
Be patient: Building a shed takes time, so relax, take breaks, and enjoy the process.

Remember, this is a general guide, and the specific steps and materials you need will vary depending on your design and local conditions. Always consult with local building codes and safety guidelines.

So, what are you waiting for? Grab your tools, put on your DIY hat, and start building your dream shed!

Read More..