Step-by-Step Pallet Shed DIY: Build Your Shed Using Reclaimed Pallets

Friday, November 22, 2024

Step-by-Step Pallet Shed DIY: Build Your Shed Using Reclaimed Pallets

Constructing a Pallet Shed: A Comprehensive DIY Guide

This guide provides a detailed, step-by-step approach to building a functional and aesthetically pleasing shed using reclaimed pallets. While utilizing reclaimed materials offers significant cost savings and environmental benefits, it necessitates careful planning and execution. This project requires basic carpentry skills and the appropriate tools; however, with meticulous attention to detail, even novice builders can achieve satisfactory results.

Phase 1: Planning and Preparation

Before commencing construction, meticulous planning is paramount. This phase involves several critical steps that lay the foundation for a successful project.

1.1 Assessing Your Needs and Site Selection

Determine the desired dimensions of your shed based on your storage requirements. Consider the items you intend to store, ensuring sufficient space for easy access and maneuverability. Simultaneously, select a suitable location for your shed, taking into account factors such as accessibility, sunlight exposure, and proximity to utilities. Ensure the chosen site is level and provides adequate drainage to prevent water accumulation.

1.2 Sourcing and Inspecting Pallets

Securing appropriate pallets is crucial. Contact local businesses, construction sites, or recycling centers to source reclaimed pallets. Inspect each pallet thoroughly for signs of rot, pest infestation, or structural damage. Select only sound pallets with robust construction. Aim for pallets of consistent size and quality to simplify the construction process. A mix of sizes will significantly complicate the build.

1.3 Gathering Tools and Materials

Assemble the necessary tools and materials before starting construction. This will streamline the process and prevent interruptions. The following list outlines essential items:

  • Measuring tape and level
  • Hammer and pry bar
  • Screwdriver (preferably cordless) and various screws (galvanized recommended for outdoor use)
  • Safety glasses and gloves
  • Circular saw or hand saw
  • Drill with assorted drill bits
  • Wood glue
  • Sandpaper and safety respirator (for sanding)
  • Post hole digger or auger (for setting posts, if necessary)
  • Concrete mix (for setting posts, if necessary)
  • Pressure treated lumber for the base (optional, but recommended for longevity)
  • Exterior-grade paint or sealant (optional, for protection from the elements)
  • Sufficient number of suitable pallets (quantity will depend on shed dimensions)

Phase 2: Shed Base Construction

A robust base is fundamental to a stable and durable shed. This section details the steps involved in constructing a sturdy foundation.

2.1 Preparing the Ground

Clear the selected site of debris, vegetation, and any obstructions. Level the ground using a rake and shovel, ensuring a flat and even surface for the base. If the ground is uneven, consider using compacted gravel to create a level foundation.

2.2 Constructing the Base Frame

Construct a rectangular frame using pressure-treated lumber. This frame will provide a solid base for the pallet walls. The dimensions of the frame should match the intended floor area of your shed. Secure the frame using appropriate screws and wood glue. Ensure the frame is perfectly square and level before proceeding.

2.3 Installing the Floor (Optional)

For added protection from moisture and improved floor stability, consider constructing a floor using plywood or additional reclaimed pallets. Attach the flooring to the base frame using screws. Ensure the flooring is flush with the frame and secured firmly.

Phase 3: Assembling the Pallet Walls

This section details the crucial step of assembling the pallet walls, ensuring structural integrity and aesthetic appeal.

3.1 Preparing the Pallets

Carefully inspect each pallet for loose or damaged boards. Reinforce any weak points using screws or wood glue. Remove any protruding nails or staples that could pose a safety hazard. Consider cleaning and sanding the pallets for a smoother finish.

3.2 Constructing the Walls

Begin by assembling the pallet walls. This may involve fastening several pallets together vertically or horizontally depending on your design and pallet dimensions. Use screws to join the pallets securely, paying close attention to alignment and stability. Consider using wood glue for added strength and to prevent movement.

3.3 Securing the Walls to the Base

Once the walls are assembled, attach them to the base frame using screws. Ensure the walls are plumb and square, making necessary adjustments as needed. This step is crucial for the overall structural integrity of the shed.

Phase 4: Roof Construction and Finishing

The final phase encompasses roof construction and the addition of finishing touches.

4.1 Building the Roof Frame

Construct a roof frame using pressure-treated lumber. The design of the roof frame can vary depending on preference, but common options include gable or shed roofs. Ensure the frame is adequately sized to support the weight of the roofing material. The frame should securely attach to the top of the walls.

4.2 Applying Roofing Material

Apply roofing material to the roof frame. Options include corrugated metal sheets, asphalt shingles, or even additional reclaimed pallets (though less weather-resistant). Ensure the roofing material is properly secured and provides adequate protection from the elements.

4.3 Finishing Touches

Once the roof is complete, consider adding finishing touches such as doors, windows, and a sealant or paint to protect the wood from moisture and weather damage. Adding a latch to the door enhances security.

Phase 5: Safety Considerations

Throughout the construction process, prioritize safety. Always wear appropriate personal protective equipment (PPE), including safety glasses, gloves, and a dust mask when sanding. Use caution when handling power tools and ensure the work area is well-lit and free of obstructions. Dispose of waste materials responsibly and in accordance with local regulations.

Building a shed from reclaimed pallets presents a rewarding DIY project, combining cost-effectiveness with environmental responsibility. By following this detailed guide, you can create a durable and functional storage solution while minimizing your environmental impact. Remember to always prioritize safety and meticulous planning for optimal results.

Read More..

How to Build a Wood Pallet Shed That’s Perfect for Your Garden Tools

Thursday, November 21, 2024

How to Build a Wood Pallet Shed That’s Perfect for Your Garden Tools

Constructing a Durable and Aesthetically Pleasing Pallet Shed for Garden Tool Storage

The construction of a garden shed offers a practical solution for organizing and protecting valuable garden tools and equipment. While prefabricated sheds are readily available, constructing a shed from reclaimed wood pallets presents a cost-effective and environmentally conscious alternative. This comprehensive guide outlines the meticulous process of building a robust and visually appealing pallet shed, suitable for various garden tool storage needs.

Phase 1: Planning and Preparation

Before commencing construction, a thorough planning phase is crucial to ensure the project's success. This involves several key steps:

Site Selection and Assessment

Choosing the appropriate location for your pallet shed is paramount. Consider factors such as proximity to the garden, accessibility for tool transport, ground stability, and sunlight exposure. Level ground is ideal to avoid unnecessary complications during construction. Assess the area for potential drainage issues, ensuring the shed's foundation will not be subjected to excessive moisture. Obtain any necessary permits from local authorities before beginning construction.

Material Acquisition and Preparation

The foundation of your shed will consist of reclaimed wood pallets. Source pallets from reputable suppliers ensuring they are treated for outdoor use and are free from significant damage or rot. Inspect each pallet carefully; discard any showing signs of infestation or extensive structural weakness. You will require a sufficient quantity of pallets to achieve the desired dimensions for your shed. In addition to pallets, gather the necessary hardware: screws (various lengths and sizes), nails, hinges, a latch, and weather-resistant paint or sealant. Consider using pressure-treated lumber for the base and roof framing for added durability.

Design Considerations and Dimensioning

Develop a detailed design plan for your shed. This plan should incorporate the desired dimensions â€" length, width, and height â€" ensuring adequate internal space for your garden tools. Sketch a simple layout, considering the arrangement of shelves and storage compartments. Decide upon the roof style; a simple gable roof is a practical choice for this project. Accurate measurements are crucial for efficient construction, minimizing material waste and ensuring a structurally sound shed.

Phase 2: Foundation and Base Construction

A robust foundation is vital for the longevity of your pallet shed. The following steps outline the process:

Foundation Construction

Construct a level foundation using concrete slabs or pressure-treated lumber. A concrete slab provides superior stability and resistance to moisture. If using lumber, create a frame using 4x4 pressure-treated posts, ensuring they are securely anchored into the ground using concrete footings. This ensures the shed remains level and stable throughout its lifespan.

Pallet Base Assembly

Once the foundation is complete, begin assembling the pallet base. This involves carefully positioning and securing the pallets to form the floor of your shed. Use screws and/or nails to create a robust and level base. Ensure that the pallets are tightly fitted together, minimizing gaps that could allow moisture to penetrate. For added stability, consider using additional bracing between the pallets.

Phase 3: Wall and Roof Construction

The construction of the walls and roof requires meticulous attention to detail to ensure structural integrity and weather resistance:

Wall Assembly

Begin assembling the walls using additional pallets. This may require some disassembly and reconfiguration of the pallets to fit the desired dimensions of your shed. Use screws to secure the pallets together, ensuring a robust and plumb structure. Consider adding additional bracing where necessary for increased stability. The height of the walls will depend on your design, but ensure sufficient headroom for comfortable access to the shed's interior.

Roof Framing and Construction

Construct the roof frame using pressure-treated lumber. A simple gable roof is a practical and aesthetically pleasing option. Cut the lumber to the appropriate lengths and angles, creating a sturdy frame that will support the roof covering. Attach the frame securely to the top of the walls using screws. Once the frame is complete, add a layer of plywood or roofing felt to create a weatherproof barrier. Finally, add roofing shingles or other suitable roofing material to complete the roof.

Door and Window Installation (Optional)

If desired, incorporate a door and/or windows into your shed's design. Use repurposed pallets or purchase new lumber to construct the door frame and window frames. Ensure the door and window fit securely within the frames and are well sealed to prevent drafts and moisture ingress. Install hinges and a latch on the door for secure closure.

Phase 4: Finishing Touches and Refinements

The final phase involves enhancing the aesthetic appeal and durability of your pallet shed:

Surface Treatment

Apply a weather-resistant sealant or paint to all exposed wood surfaces. This protects the wood from moisture damage, rot, and insect infestation, significantly extending the lifespan of your shed. Choose a paint or sealant that complements your garden's aesthetic.

Interior Organization

Organize the interior of the shed to maximize storage space and improve accessibility. Consider installing shelves using additional pallets or lumber. You can also add hooks for hanging tools and other equipment.

Landscaping and Integration

Integrate your pallet shed into the surrounding garden landscape. Consider adding landscaping features, such as plants and pathways, to enhance the overall aesthetic appeal. This will blend the shed seamlessly into the garden's design.

Safety Precautions

Throughout the construction process, prioritize safety. Wear appropriate safety gear, including safety glasses, gloves, and sturdy work boots. Use caution when working with power tools and sharp objects. Ensure proper ventilation when working in enclosed spaces. Always follow the manufacturer's instructions for all materials and tools used in the construction process.

By meticulously following these steps, you can successfully construct a durable and aesthetically pleasing pallet shed, providing a practical solution for storing your valuable garden tools and equipment. Remember, careful planning and attention to detail are crucial for ensuring a successful and rewarding project.

Read More..

DIY Pallet Shed Plans for Outdoor Storage on a Budget

DIY Pallet Shed Plans for Outdoor Storage on a Budget

DIY Pallet Shed Plans for Outdoor Storage on a Budget

Constructing a functional and aesthetically pleasing outdoor shed can be a significant undertaking, often involving substantial financial investment. However, by utilizing readily available and cost-effective materials such as reclaimed pallets, a resourceful individual can create a durable and attractive storage solution at a fraction of the traditional cost. This detailed guide provides comprehensive plans for building a DIY pallet shed, focusing on maximizing efficiency and minimizing expenditure while maintaining structural integrity and visual appeal.

I. Planning and Preparation: Laying the Foundation for Success

Before commencing any construction, meticulous planning is crucial. This initial phase lays the groundwork for a successful project, ensuring efficiency and minimizing potential setbacks.

A. Site Selection and Assessment

The chosen location should be level, well-drained, and easily accessible. Consider proximity to power sources if electrical appliances are to be stored within the shed. Assess the surrounding area for potential obstructions like trees or underground utilities. A detailed site plan, including measurements and the shed's orientation relative to sunlight and prevailing winds, should be prepared.

B. Material Acquisition and Preparation

Pallet Sourcing: Reclaimed pallets are the cornerstone of this project. Source pallets from local businesses, construction sites, or online marketplaces, ensuring they are structurally sound and free from rot or significant pest infestation. Inspect each pallet meticulously for broken boards, loose nails, and protruding hardware.

Quantity Estimation: The required number of pallets will depend on the desired dimensions of your shed. A detailed blueprint (discussed later) will aid in accurate estimation. It is prudent to acquire slightly more pallets than initially estimated to account for potential damage or imperfections during the construction process.

Material Cleaning and Preparation: Once collected, thoroughly clean the pallets to remove dirt, debris, and any potential hazards. Remove any loose nails or protruding hardware and carefully inspect each board for damage. Consider sanding rough edges and surfaces for a smoother finish and enhanced safety.

Supplementary Materials: In addition to pallets, you will need a variety of other materials, including:

  • Concrete or gravel for the base
  • Pressure-treated lumber for the foundation and framing (if needed)
  • Exterior-grade plywood or OSB for sheathing (optional)
  • Roofing material (e.g., corrugated metal, asphalt shingles)
  • Nails, screws, and other fasteners
  • Exterior-grade paint or sealant
  • Tools (hammer, saw, drill, level, measuring tape, etc.)

II. Construction: Building the Pallet Shed Structure

This phase focuses on the assembly of the pallet shed, transforming the collected materials into a functional structure. Careful execution and attention to detail are vital for ensuring the longevity and stability of the shed.

A. Foundation Construction

A stable foundation is essential. Options include a concrete slab, a gravel base, or a combination of both. For a simpler approach, a gravel base provides adequate drainage and leveling, while a concrete slab offers superior durability and stability. The foundation should extend beyond the shed's footprint to provide additional support.

B. Pallet Assembly and Wall Construction

Begin by assembling the pallet walls. This can be done by stacking pallets vertically or horizontally, depending on the desired aesthetic and structural requirements. For increased strength, use longer screws to secure the pallets together. Ensure that the walls are plumb and level using a level and appropriate shims. Consider using pressure-treated lumber for additional framing to strengthen the structure and create a more robust frame.

C. Roof Construction

The roof design should accommodate the shed's dimensions and the chosen roofing material. A simple gable roof is a practical choice, requiring relatively straightforward construction. Framing for the roof should be made from pressure-treated lumber to ensure durability and stability. Secure the roofing material to the frame, ensuring proper overlap and sealing to prevent leaks.

D. Door and Window Installation

If desired, incorporate a door and windows into the design. This can be achieved by cutting openings in the pallet walls and installing appropriate frames and hardware. Consider using scrap lumber or purchasing pre-made door and window frames for a cleaner finish. Securely fasten the door and window frames to the pallet walls for stability.

III. Finishing Touches and Enhancements

The finishing touches significantly enhance the appearance and functionality of the shed. These steps are crucial for ensuring the longevity and aesthetic appeal of the completed structure.

A. Exterior Finishing

Apply an exterior-grade paint or sealant to protect the pallets from the elements and enhance their visual appeal. Choose a color that complements the surrounding environment. Consider adding decorative features like trim or molding to further enhance the shed's appearance.

B. Interior Finishing (Optional)

If desired, you can add interior finishing touches such as shelving or additional wall paneling. This can improve the organization and functionality of the shed's interior space. Use suitable interior materials that are resistant to moisture and pests.

IV. Safety Considerations

Throughout the construction process, safety should be paramount. Wear appropriate personal protective equipment (PPE), including safety glasses, work gloves, and sturdy footwear. Use caution when working with power tools, and ensure that the work area is well-lit and free from obstructions. Always follow manufacturer's instructions for all tools and materials used.

Building a DIY pallet shed offers a rewarding and cost-effective way to add valuable outdoor storage space. By carefully following these plans and prioritizing safety, you can create a durable and aesthetically pleasing shed that serves your needs for years to come. Remember that adaptations and modifications can be made to suit individual preferences and available resources. The key is careful planning, diligent execution, and a commitment to quality workmanship.

Read More..

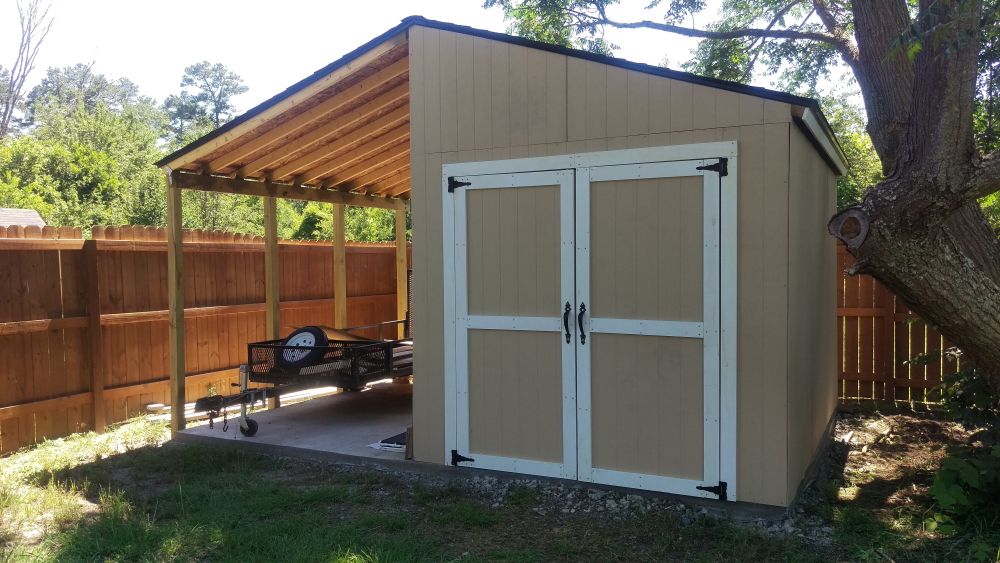
DIY Lean-To Shed: A Simple Guide to Backyard Storage Building

DIY Lean-To Shed: A Simple Guide to Backyard Storage Building

DIY Lean-To Shed: A Simple Guide to Backyard Storage Building

Tired of clutter overflowing your garage and backyard? Yearning for a simple, affordable solution to your storage woes? Building your own lean-to shed is a fantastic weekend project that delivers big results with surprisingly little effort. This guide provides a step-by-step walkthrough, empowering you to create a functional and attractive addition to your property. Forget expensive pre-fabricated sheds; you'll be amazed at what you can achieve with readily available materials and a little elbow grease.

Planning Your Lean-To Shed

Before you grab a hammer, careful planning ensures a successful build. Begin by determining the ideal location for your lean-to. Consider proximity to existing structures (like a house or garage) for support and ease of access. Then, measure the available space and decide on the dimensions of your shed. Sketch a simple design, noting the height, width, and depth. Remember to check local building codes and permits â€" some municipalities require permits for even small structures. Finally, create a detailed materials list based on your design. This list should include lumber (pressure-treated is recommended for longevity), roofing materials (metal roofing is durable and easy to install), fasteners (screws are preferable to nails), and any additional features you desire, such as a door or windows.

Gathering Your Materials and Tools

Once your plan is finalized, head to your local lumberyard or home improvement store. Gather all necessary materials according to your list. Don't forget essential tools, including a measuring tape, level, saw (circular saw or hand saw), drill, post hole digger (if needed), shovel, and safety glasses. A helper will significantly speed up the process, particularly during the more physically demanding stages of construction.

Essential Materials List

  • Pressure-treated lumber for the frame and supports
  • Roofing material (metal, asphalt shingles, or polycarbonate)
  • Screws of various sizes
  • Concrete mix (if needed for posts)
  • Building wrap or tar paper (for weather protection)

Building the Shed Frame

Start by establishing a solid foundation. If your lean-to rests against an existing structure, ensure that the supporting wall is strong enough to handle the added weight. For freestanding lean-tos, consider setting concrete posts in the ground for added stability. Next, construct the frame. Begin by assembling the base frame, creating a rectangular structure using your pressure-treated lumber. Square the frame carefully to avoid future issues. Then, erect the supporting posts, ensuring they are plumb and level. Attach the rafters to the supporting structure and the existing wall (or posts) using screws, creating a sloping roofline. Remember to regularly check your work with a level to maintain accuracy and prevent structural issues.

Roofing and Finishing Touches

Once the frame is complete, you can install your chosen roofing material. Metal roofing is an excellent choice for its durability and ease of installation. Follow the manufacturer’s instructions carefully during this process. Next, apply building wrap or tar paper to protect the structure from the elements before adding your chosen roofing material. Finally, add any desired finishing touches. A simple door adds security and convenience. Consider adding shelves for optimal storage. A fresh coat of paint or stain will protect the wood and enhance the shed’s aesthetic appeal, completing your DIY lean-to shed project.

Remember: Safety first! Always wear appropriate safety gear, including safety glasses and work gloves. If you encounter any challenging aspects of the project, don't hesitate to seek advice from a more experienced builder.

Read More..

How to Build a Wood Pallet Shed for Your Garden and Tools

How to Build a Wood Pallet Shed for Your Garden and Tools

Constructing a Durable and Aesthetically Pleasing Wood Pallet Shed for Garden Storage

The construction of a garden shed offers a practical solution for organizing and protecting outdoor tools and equipment. Utilizing reclaimed wood pallets presents a cost-effective and environmentally conscious approach to this project. This comprehensive guide details the process of building a robust and visually appealing wood pallet shed, emphasizing safety and best practices throughout.

Phase 1: Planning and Preparation

Before commencing construction, meticulous planning is paramount to ensure a successful outcome. This phase encompasses material acquisition, site selection, and the creation of a detailed blueprint.

1.1 Material Acquisition and Assessment

Pallet Selection: The foundation of the shed rests upon the quality of the pallets selected. Prioritize pallets constructed from pressure-treated lumber, suitable for outdoor exposure, exhibiting minimal signs of damage or rot. Inspect each pallet for loose nails, broken boards, and any evidence of pest infestation. Ensure that all pallets are of consistent dimensions to simplify construction. The number of pallets required depends on the desired shed size, typically requiring a minimum of 10-15 pallets for a small structure.

Additional Materials: Beyond the pallets, additional materials are necessary to complete the project. This includes:

  • Concrete blocks or a suitable foundation base.
  • Exterior-grade screws and nails of appropriate length.
  • Wood preservative or sealant for enhanced weather protection.
  • Roofing materials (e.g., corrugated metal sheets, asphalt shingles).
  • Hinges, latch, and other necessary hardware for the door.
  • Level, measuring tape, saw (circular saw or hand saw), hammer, drill, screwdriver.
  • Safety glasses and work gloves.

1.2 Site Selection and Preparation

Location: Choose a level location with adequate sunlight and proximity to the garden area. Consider drainage to prevent water accumulation around the shed. Ensure compliance with any local building regulations or homeowner association guidelines.

Site Preparation: Clear the selected area of debris, vegetation, and any obstacles. Level the ground to ensure a stable foundation. For a permanent structure, a concrete slab or a foundation built with concrete blocks is highly recommended. A simple gravel base provides a less permanent, yet functional alternative.

1.3 Blueprint and Design Considerations

Dimensions: Determine the desired dimensions of the shed based on the storage needs and the available space. Simple rectangular designs are easiest to construct for beginners. A detailed sketch or blueprint illustrating the layout, dimensions, and material requirements is crucial. This plan should outline the pallet arrangement, door location, and roofing structure.

Door Placement: Strategically place the door for optimal access and convenience. Consider the prevailing wind direction to minimize exposure to harsh weather conditions. A simple single door is adequate for smaller sheds.

Roof Design: A simple gable roof provides effective water runoff. Consider the slope of the roof to ensure proper drainage. The roof's design should be integrated into the overall blueprint, ensuring compatibility with the pallet structure.

Phase 2: Construction and Assembly

With the planning complete, the construction process can begin. This phase requires careful attention to detail and adherence to safety precautions.

2.1 Foundation Construction

Concrete Slab: A concrete slab provides the most robust and durable foundation. Follow the appropriate instructions for concrete mixing and pouring, ensuring a level and stable base for the shed. Allow adequate curing time before proceeding.

Concrete Block Foundation: Alternatively, a foundation can be constructed using concrete blocks. Arrange the blocks to form the desired base, ensuring a level and stable platform. Use mortar to secure the blocks, providing a sturdy and long-lasting base.

Gravel Base: For a less permanent solution, a gravel base can be utilized. Level the ground and lay down a layer of gravel, compacting it to create a firm base for the pallets.

2.2 Pallet Arrangement and Securing

Base Layer: Begin by laying the first layer of pallets directly on the prepared foundation, ensuring they are level and aligned. Secure them together using exterior-grade screws or nails, reinforcing the corners and edges. Use appropriate fasteners to prevent splitting of the pallet wood.

Wall Construction: Subsequent layers of pallets are stacked on top, interleaving the gaps between the boards for added strength and stability. Secure each layer with screws or nails, creating a robust and integrated wall structure. Consider the placement of the door opening during this process.

Corner Reinforcement: Reinforce the corners of the shed using additional pallets or strong lumber to enhance structural integrity. These reinforcements will help prevent sagging and ensure long-term durability.

2.3 Door Installation and Roofing

Door Frame: Create a frame for the door using additional pallet wood or lumber, ensuring a snug fit within the opening. Attach hinges to the frame and the shed's structure, allowing for smooth and secure door operation.

Roof Construction: Construct the roof framework according to the design, using additional lumber if necessary. Ensure adequate support and structural integrity. Attach the roofing material securely, ensuring proper overlap and waterproofing.

2.4 Finishing Touches and Refinements

Weather Protection: Apply a wood preservative or sealant to all exposed surfaces to protect the wood from moisture and the elements. This step significantly extends the lifespan of the shed.

Hardware Installation: Install the door latch, handle, and any other necessary hardware, ensuring smooth operation and security.

Optional Features: Consider adding shelves, ventilation, or other features to enhance functionality and aesthetics. These additions can be incorporated during or after the main construction phase.

Phase 3: Post-Construction Considerations

Following the completion of the shed construction, several important considerations remain.

3.1 Inspection and Maintenance

Thorough Inspection: Once the shed is complete, perform a thorough inspection to identify any potential issues, such as loose boards, gaps in the structure, or inadequate weather protection.

Regular Maintenance: Regular inspections and maintenance are crucial to ensure the long-term durability of the shed. Inspect for signs of damage, pest infestation, or decay. Apply fresh sealant or preservative as needed. Address any issues promptly to prevent significant damage.

3.2 Safety Precautions

Safe Handling of Materials: Throughout the construction process, always prioritize safety. Wear appropriate safety gear, including safety glasses and work gloves. Use caution when handling tools and materials to prevent injury.

Secure Storage of Tools: After completion, store tools and materials securely to prevent accidents and theft.

By following these steps diligently, you can construct a durable, aesthetically pleasing, and functional wood pallet shed, providing ample storage space for your garden tools and equipment. Remember that meticulous planning, careful execution, and ongoing maintenance are key to the success of this project.

Read More..

DIY 12x20 Shed Plans with Loft: Maximize Your Outdoor Storage

Saturday, November 16, 2024

DIY 12x20 Shed Plans with Loft: Maximize Your Outdoor Storage

DIY 12x20 Shed Plans with Loft: Maximize Your Outdoor Storage

Dreaming of a spacious, organized outdoor storage solution? A 12x20 shed with a loft offers incredible versatility, transforming a simple storage structure into a highly functional space. This comprehensive guide provides detailed plans and insights to help you build your own, maximizing storage potential and adding value to your property. Forget cramped, cluttered sheds; let's build the ultimate outdoor haven!

Planning Your 12x20 Shed with Loft

Before you grab your tools, careful planning is key. Begin by considering your specific needs. What will you store in the shed? How much headroom do you need in the loft? Understanding your storage requirements dictates the internal layout. Will you need shelving, workbench space, or specialized racking? Sketch out a rough floor plan, noting the placement of windows, doors, and the loft access. This helps visualize the final product and ensures you have enough room for everything you intend to store. Remember to check local building codes and obtain any necessary permits before starting construction.

Choosing the Right Materials

Select durable, weather-resistant materials for longevity. Pressure-treated lumber forms a strong, rot-resistant foundation. For siding, consider options like vinyl, metal, or composite materials, each offering varying levels of maintenance and aesthetic appeal. Opt for roofing materials that withstand your region's weather conditions, such as asphalt shingles, metal roofing, or even durable rubber roofing. Don't forget the necessary fasteners, screws, and other hardware â€" investing in quality materials upfront translates to a stronger, more long-lasting structure.

Building the Shed Foundation

A solid foundation is crucial for a stable shed. You have several options, including a concrete slab, concrete piers, or a gravel base. A concrete slab offers the most stability, but requires more labor and expertise. Concrete piers provide a good balance between stability and ease of construction. A gravel base is the simplest option but offers the least stability. Carefully level the ground before laying your chosen foundation. This stage sets the tone for the entire project; ensuring a level base guarantees a square shed. Accurate measurements at this point prevent headaches down the line.

Framing the Shed Walls and Roof

Construct the shed's walls using standard framing techniques. Employ plumb bobs and levels to guarantee square walls, essential for a structurally sound building. Build the roof trusses according to your chosen design; consider a gable roof for maximum headroom in the loft. Properly bracing and sheathing the walls and roof provides essential rigidity and weather resistance. Take your time with this step; accuracy here is paramount for the shed's stability and longevity.

Constructing the Loft

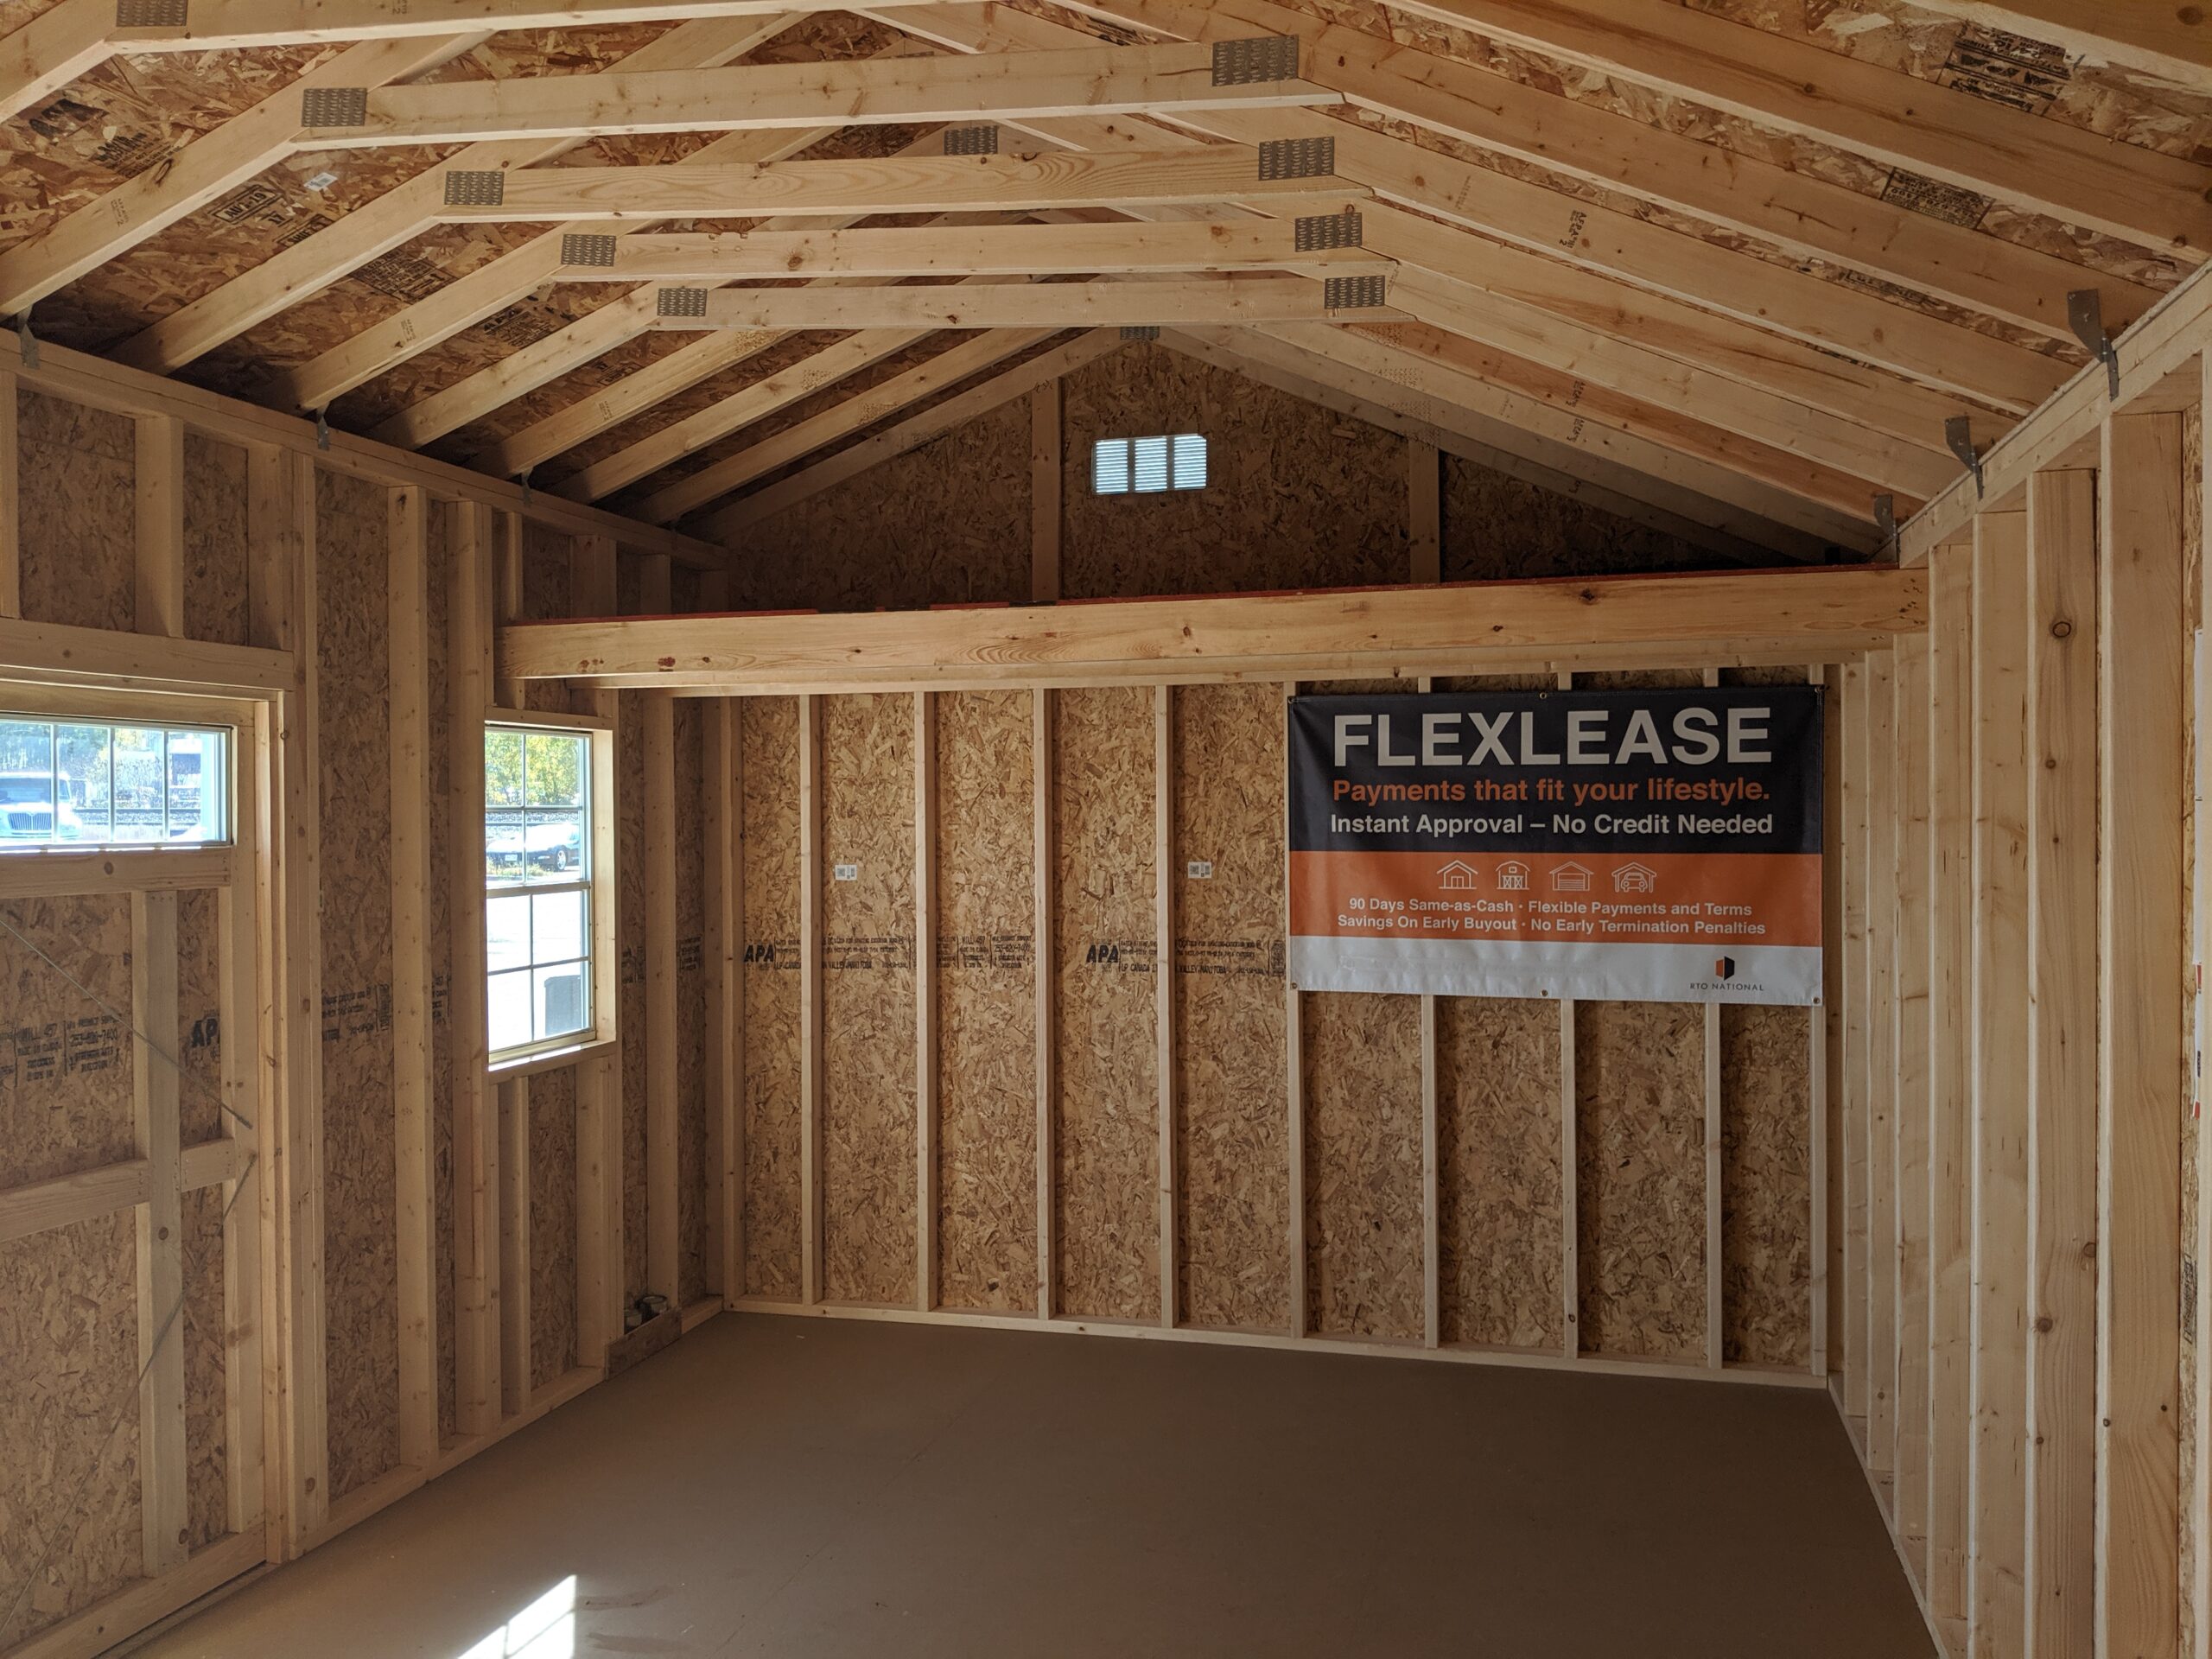
The loft adds significant storage capacity. Plan for adequate headroom and sturdy support beams. Construct a framed floor for the loft, ensuring it’s securely attached to the main structure. Use appropriate lumber sizing to support the anticipated weight. Install a sturdy staircase or ladder for safe access. Carefully measure and cut the lumber for a precise and secure fit. This step requires attention to detail; a well-built loft provides safe and efficient additional storage space.

Finishing Touches

Once the framing is complete, add the siding, roofing, and trim. Install windows and doors, ensuring proper weather sealing. Paint or stain the exterior to protect the wood and enhance the shed's aesthetic appeal. Consider adding additional features like shelving, workbenches, and lighting to fully realize the potential of your new storage space. These final touches transform the shed from a simple structure to a valuable asset.

Safety First

Throughout the entire building process, prioritize safety. Always wear appropriate safety gear, including safety glasses, gloves, and work boots. Use proper lifting techniques to avoid injury. Follow all manufacturer's instructions for power tools and materials. Double-check measurements and ensure secure fastening of all components. Building a shed is a rewarding project, but safety must remain paramount throughout the process.

Building your own 12x20 shed with a loft is a challenging but rewarding undertaking. By following these detailed plans and prioritizing careful planning and execution, you can create a customized storage solution that perfectly meets your needs. Enjoy the process and the satisfaction of building something with your own two hands!

Read More..

DIY Pole Barn Plans: How to Build It for Maximum Durability

Monday, November 11, 2024

DIY Pole Barn Plans: How to Build It for Maximum Durability


A pole barn, also known as a post-frame building, is a versatile and economical structure perfect for a multitude of uses, from storage to workshops to living spaces. Their simplicity and adaptability make them a popular choice for DIY construction, but achieving maximum durability requires careful planning and execution. This comprehensive guide will equip you with the knowledge and tools to build a pole barn that stands strong for years to come.

Planning is Key: Laying the Foundation for Success

Before hammering the first nail, meticulous planning is paramount. Consider the following factors:

1. Purpose and Use: Determine the primary function of your pole barn. This will inform the size, layout, and features you need.

2. Site Selection: Choose a level site with adequate drainage. Check for underground utilities and ensure compliance with local building codes.

3. Design and Dimensions: Sketch your desired layout, including the size, roof pitch, and any desired features like doors, windows, or lofts. Professional software can be helpful for detailed design and calculations.

4. Building Materials: Select high-quality, durable materials. Consider the climate and anticipated usage. For instance, treated lumber is recommended for foundation posts, while steel roofing offers excellent weather resistance.

5. Budget and Timeframe: Set a realistic budget and timeframe to avoid overspending or delays. Factor in permits, materials, labor, and potential contingencies.

6. Permits and Inspections: Contact your local building department to obtain necessary permits and understand inspection requirements.

Step-by-Step Construction: From Foundation to Finish

1. Foundation: The Bedrock of Durability

a) Post Holes: Excavate post holes to the required depth, typically 3-4 feet for frost lines, using a post hole digger or auger.

b) Concrete Footings: Pour concrete footings at the bottom of each post hole, ensuring they are level and centered. Allow sufficient time for concrete to cure.

c) Pressure-Treated Posts: Use pressure-treated lumber for foundation posts to resist decay and insects. Cut posts to the desired length and ensure they are straight and free of defects.

d) Anchor Posts: Secure the posts to the footings using concrete anchors, heavy-duty bolts, or specialized post anchors.

2. Framing the Walls: Building a Strong Skeleton

a) Wall Plates: Install pressure-treated wall plates on top of the foundation posts. These will support the wall framing.

b) Wall Studs: Frame the walls with vertical studs, typically spaced 16 inches apart. Use high-quality lumber and ensure proper bracing for stability.

c) Sheathing: Apply sheathing, typically plywood or OSB, to the exterior of the framed walls. This provides structural integrity and a base for siding.

d) Siding: Install your chosen siding material, whether wood, metal, or vinyl. Choose siding that complements the design and offers desired durability.

3. Roofing: Providing Shelter from the Elements

a) Roof Trusses: Construct or purchase roof trusses according to your design and specifications. Trusses provide the framework for supporting the roof.

b) Roof Sheathing: Install sheathing, typically plywood or OSB, on top of the trusses. This provides a solid base for the roof covering.

c) Roofing Material: Choose a durable and weather-resistant roofing material. Popular options include metal, asphalt shingles, or tile.

d) Flashing and Trim: Install flashing around chimneys, vents, and other penetrations to prevent water infiltration. Add trim and finishing details to enhance the aesthetic appeal.

4. Interior Finishing: Creating a Functional and Comfortable Space

a) Insulation: Install insulation in the walls and ceiling for thermal efficiency and comfort. Consider different types of insulation based on your climate and budget.

b) Drywall: Apply drywall to the interior walls and ceilings for a finished look. Tape, mud, and paint the drywall for a professional finish.

c) Flooring: Choose a durable and appropriate flooring material for your needs. Options include concrete, wood, or vinyl.

d) Electrical and Plumbing: Install wiring, electrical fixtures, and plumbing as needed. Consult with licensed professionals for safe and code-compliant installation.

5. Doors and Windows: Enhancing Functionality and Aesthetics

a) Door Frames: Install door frames at desired locations. Choose durable materials and ensure proper installation for weather resistance.

b) Doors: Select and install doors that meet your needs. Options include single, double, sliding, or overhead doors.

c) Window Frames: Install window frames for natural light and ventilation. Consider energy-efficient windows for optimal performance.

d) Glass and Hardware: Install glass panes in the window frames and ensure proper hardware for opening and closing.

Maintaining Your Pole Barn: Ensuring Longevity

Regular maintenance is vital to preserving your pole barn's durability and extending its lifespan. Here are some key practices:

1. Inspect Foundation Posts: Regularly inspect foundation posts for signs of rot, insect damage, or movement. Address any issues promptly to prevent structural problems.

2. Roof Maintenance: Inspect the roof for damage, leaks, or missing shingles. Clean gutters regularly to prevent water buildup and damage.

3. Siding and Trim: Inspect siding for loose boards, cracked paint, or damage. Repaint or replace damaged sections as needed.

4. Insulation and Ventilation: Check for gaps, tears, or moisture in insulation. Ensure proper ventilation to prevent mold and mildew growth.

5. Pest Control: Implement pest control measures to prevent termites, rodents, and other pests from damaging your pole barn.

Conclusion: Building a Legacy of Strength and Resilience

Building a pole barn from scratch is a rewarding experience, offering flexibility and cost-effectiveness. By carefully planning, utilizing durable materials, and employing proper construction techniques, you can build a structure that stands the test of time. Remember that regular maintenance is crucial for preserving your investment and ensuring your pole barn remains a reliable and functional asset for years to come.

Read More..